5 Restorative Poses to Help Tight Hip Flexors
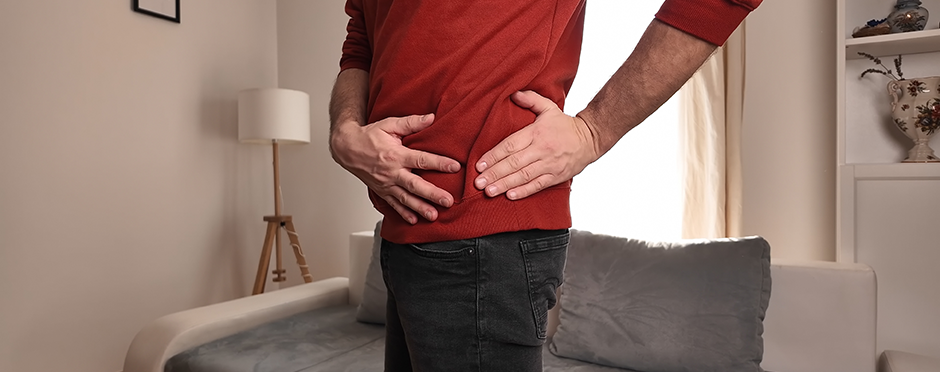
Leave a CommentDo you ever stand up and ask yourself, “Why are my hips so tight?” There are many reasons, but one may be that, on average, we sit around for 10-14 hours per day, and those muscles are being overused. Today, we will review some restorative poses that could help you with the tightness in your hips. These restorative poses use props such as blankets, bolsters, yoga blocks, and more to help your body feel supported and relaxed. The goal is not to stretch the muscles but to relax the body and mind.
Caution: If you are pregnant, please check with your doctor before performing the following poses. Some of these poses are not recommended for individuals with spondylolisthesis or spondylolysis, or those who have neck, lower back, and/or knee pain. Use caution if you have disc disease, chronic sacroiliac dysfunction, pinched nerves in the neck, and/or knee injuries.
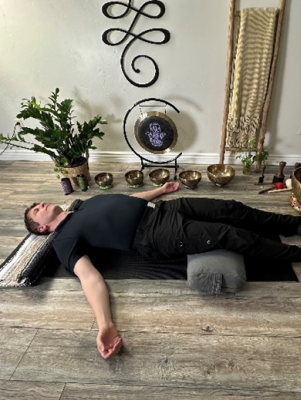
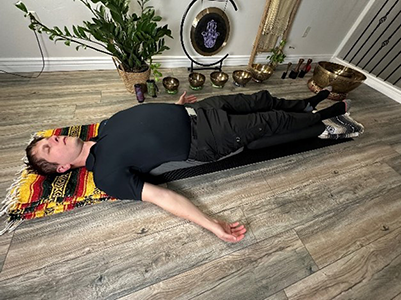
Basic Relaxation Pose
For this pose, you will need 1 bolster and 1 folded blanket
- To get into this position, you will want to start by setting up your props first
- One bolster that you will use under your knees.
- You will place one folded blanket under your head and neck to allow your chin to be a little lower than your forehead.
- Start by lying on your side next to the props
- You will then roll yourself onto the props
- Adjust the props as needed to feel comfortable
- Allow your arms and legs to be away from the middle of your body
- You can place your hands with your palms up
- Hold this position for 5 to 15 minutes
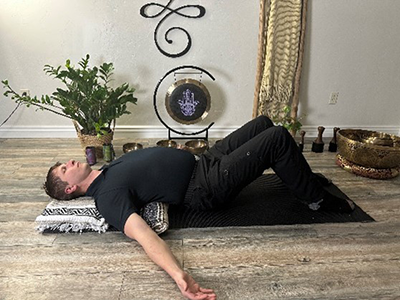
Simple Supported Back Bend
For this pose, you will need 2 blankets (1 folded blanket and 1 rolled blanket)
- To get into this position, you will want to start by setting up your props first
- Place one rolled blanket in the middle of your back (the middle of the blanket should be just below your shoulder blades)
- Place a folded blanket under the top of your shoulders to support your head and neck. Make sure that your neck is completely supported.
- Then, you will want to be lying on your side next to the props
- You will then roll yourself onto the props
- Your arms can be out to the side with your palms facing up
- Adjust the props as needed to feel comfortable
- You should start by being in this position for only one minute. Gradually, you may increase the time you spend in this position.
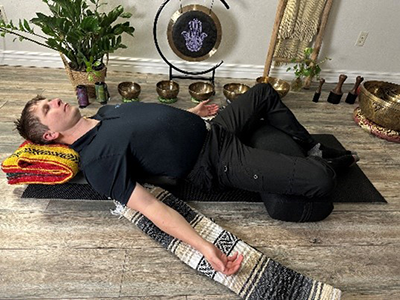
Support Bound – Angle Pose
For this pose, you will need 1 Bolster, 5 blankets (1 folded blanket and 4 rolled blankets)
- To get into this position, you will want to start by setting up your props first
- The goal of the props is to create a 45-degree angle from the floor to your head
- Place a bolster vertical to allow the bolster to connect your sacrum to your head
- On top of that bolster, place a blanket where your head will land to help support your head and neck. Allow your forehead to be slightly higher than your chin.
- One rolled blanket will be needed under each arm, with the arms being in the center of the rolled-up blankets
- One rolled blanket will be needed under each knee (both knees will need to be at the same height). You could also use one bolster under both knees instead of the blankets.
- Bring your glutes close to the bolster
- Slowly lower yourself onto the bolster
- Bring your feet together with the bottoms of the feet touching together
- Place the rolled blankets underneath your knees
- Place the rolled blankets underneath your arms
- Your arms can be out to side with the palms up
- Adjust the props as needed in order to feel comfortable
- You can be in this position for 5 to 15 minutes
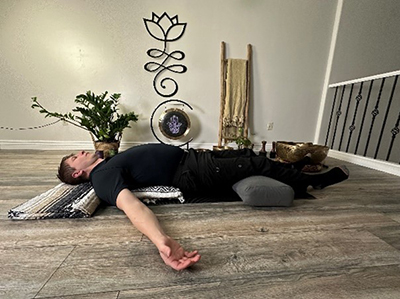
Mountain Brook Pose
For this pose, you will need 1 bolster and 2 blankets (1 folded blanket and 1 rolled blanket)
- To get into this position, you will want to start by setting up your props first
- Place one bolster under your knees
- Place one folded blanket in the middle of your back (the middle of the blanket should be just below your shoulder blades)
- Place a rolled-up blanket under the top of your shoulders to give support to your head and neck, making sure that your neck is completely supported
- Then you will want to be laying on your side next to the props
- You will then roll yourself onto the props
- Your arms can be out to the side with your palms facing up
- Adjust the props as needed to feel comfortable
- You can be in this position for five minutes. Gradually over time with practice, you may increase the time you spend in this position
Supported Bridge Pose
For this you pose, you will need 2 Bolsters, 1 small towel (rolled up).
- To get into this position you will want to start by setting up your props first
- Place two bolsters vertically touching each other
- Place a rolled-up towel at the base of your neck to prevent your chin going into your chest
- You will first sit on the bolster
- Adjust your sitting position so that you will land in the correct placement
- Then you will slowly lower yourself onto the props (If your back is stiff, you may need to use blankets instead of the bolsters. If you are tall, you may need to add a blanket or two at the end of the bolsters)
- Your arms can be out to the side with your palms up
- Adjust the props as needed to feel comfortable
- You can be in this posture for 5 to 15 minutes.
Did You Feel More Relaxed in Your Hips?
We went over five different restorative poses that may help with your hip flexor tightness. Each pose can be modified by adding or removing props. Each can also be performed for a short or longer amount of time. Just make sure that you feel relaxed and supported in these postures above. If you experience any pain as you perform these positions, contact your nearest Athletico to schedule a free assessment with our team.
*Per federal guidelines, beneficiaries of plans such as Medicare, Medicaid, Tricare, VHA and other federally funded plans are not eligible for free assessments.
The Athletico blog is an educational resource written by Athletico employees. Athletico bloggers are licensed professionals who abide by the code of ethics outlined by their respective professional associations. The content published in blog posts represents the opinion of the individual author based on their expertise and experience. The content provided in this blog is for informational purposes only, does not constitute medical advice and should not be relied on for making personal health decisions.
References:
1. Lasater, Judith Ph.D, PT. (2011). Relax and Renew: Restful Yoga for Stressful Times. Shambhala Publications, Inc.
2. Starrett, Kelly, et al. Deskbound: Standing up to a Sitting World. Victory Belt Publishing, 2016.
